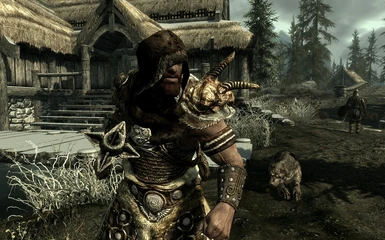
Skyrim Female Fur Armor Mod
For The Elder Scrolls V: Skyrim Special Edition on the Xbox One, a GameFAQs message board topic titled 'Mod for female skimpy armor?' Check when installing mods for patches that allow your installed mods to work together better. Skyrim Armor Mods; Skyrim Female Fur Armor Mod Minecraft.
Loincloth style[editedit source]
| Fur Armor | |
|---|---|
| {{{extra}}} | |
| Light armor | |
Slot | Chest |
| 25 | |
Weight | 6 |
| 50 | |
Set name | Fur Armor Set |
| Leather | |
| 0010594b | |
Fur Armor is an item within Skyrim. It is a piece of armor that your character can equip to bolster their defense. This armor is slightly tougher than Hide Armor.
Found
- Loot
Female upper body[editedit source]
| Fur Armor | |
|---|---|
| {{{extra}}} | |
Type | Light armor |
| Chest | |
| 25 | |
| 6 | |
Base Value | 50 |
| Fur Armor Set | |
Upgrade Ingredient | Leather |
| 0010594d | |
One-piece[editedit source]
| Fur Armor | |
|---|---|
| {{{extra}}} | |
| Light armor | |
Slot | Chest |
| 25 | |
Weight | 6 |
| 50 | |
Set name | Fur Armor Set |
| Leather | |
| 0006f393 | |
| Fur Armor | |
|---|---|
| {{{extra}}} | |
Type | Light armor |
| Chest | |
| 25 | |
| 6 | |
Base Value | 50 |
| Fur Armor Set | |
Upgrade Ingredient | Leather |
| 0010594f | |
Contents.OverviewThis tutorial shows all the main steps you need to follow to create an armour or an outfit from scratch for Skyrim. If you only want to change the textures of an existing piece of clothing or change its properties and bonus, just skip the first part of the tutorial. Big hero 6 720p. If you want to adapt existing armours or outfits to other bodies you will have to follow the steps explained here, except that you won't have to create the mesh (but you may probably have to adapt it to the new body), the textures or the UV maps.Currently the tools used for modelling are not completely adapted for Skyrim, there are some steps that require some manual adjustments. Skyrim armour/clothing meshes and character weightSkyrim has introduced a new feature for characters: the weight slider. You can set the weight of characters or NPCs from 0% (the weight slider is completely to the left) to 100% (the slider is completely to the right). The changes in the shape of the character are managed using 2 mesh files for each armour/piece of clothing (this also applies to the meshes that contain parts of the body):.
Jun 22, 2013 Skyrim Adult Mods; BEST SEXY/HOT ARMORS FOR SKYRIM GIRLS Sign in to follow this. BEST SEXY/HOT ARMORS FOR SKYRIM GIRLS. Sexy Vanilla Female Armor by Crosscrusade. Very well done armors, no clipping, everything fits tight and the armors have a remarkable style. Share this post. Rough Leather Armor - tight dark brown leather with chain sleeves. Bob’s Armory Skyrim - hats and veils ranging from stylish to silly. Masters of Death - Rise of the Brotherhood - gorgeous breastplate with several color options. Regal Huntsman Armor - one of my favorites, a retexture of the dragon cultist armor with many color combos. Credits and distribution permission. Other user's assets All the assets in this file belong to the author, or are from free-to-use modder's resources; Upload permission You can upload this file to other sites but you must credit me as the creator of the file; Modification permission You are allowed to modify my files and release bug fixes or improve on the features without permission from.
With 0% weight, the game uses the 0.nif. With 100% weight, the game uses the 1.nif. With any intermediate weight, the game combines the 0.nif and the 1.nifAn example of this is shown in picture Skyrim armour/clothing meshes and character weight.This means that you will have to create two meshes for each of the armours/pieces of cloth instead of only one. In this tutorial we are going to create first the 0.nif armour and once it is finished we will adapt it to the 1.nif bodyCreate the 0.nif armour mesh Import into Blender all parts of the 0.nif body. Deleting the skeletonWhen creating an outfit or an armour first thing is to decide what body you want to make the clothes for.
If you want to create an armour that fits several bodies (male and female, for example) you will have to create different armours for each body.That is why the first step is to import into Blender all the parts of the body you want to work with. The nif files that contain the body meshes are in the folder DataMeshesactorscharactercharacter assets.Note: The meshes and textures of the game are inside compressed files with BSA format. Adding the Mirror modifierWhen creating armours or clothes you can work only with half of the meshes and apply after the Mirror modifier to make the clothes symmetrical. To use this technique:. Create a mesh that covers only half of the body and make sure that the center of the mesh, in Object mode, is in the axis that separates the body in two as shown in picture Working with half of the mesh. Add the Mirror modifier (see picture Adding the Mirror modifier). In Object mode, in the Editting (F9) area click on the button Add modifier and select Mirror from the drop down list.
Skyrim More Armor Mod
You'll see that your object is now symmetrical and covers both sides of the body like in the picture. Work with the mesh only in one half of the body and all the changes you do there will be symmetrically replicated into the other part of the mesh. Once you've finished making your mesh press the Apply button that is beside the Mirror modifier. This will make your mesh real in both sides of the body (leave this step to the end, when you are sure you won't modify the mesh anymore, because once you've applied the modifier you cannot go back).Give sense of volume. Associating an image to the textureWhile you are making the armour object or after finishing it you have to add a material to it.
The game requires the material because all textures, UV maps and properties that define how it will be seen in game are to be associated to this material.1. To create a material, in the Editing(F9) area press on the New button (the button encircled in the image Adding a material).2. Next, in the Shading (F5) area press the red ball (Material buttons), and that will open the area that is shown in the picture Adding a texture. Here you can change the name of the materials on the Links and Pipeline tab, change the material properties and add a texture. The material properties can also be modified in NifSkope and it is easier to do it there, so in this screen we are only going to add a texture to the material. To do so press on the Add New button on the Texture tab.3.
Once you've added the texture two new tabs will appear: Map Input and Map To. Go to the Map Input tab and select UV as shown in the Map Input: UV picture. This is important so that the mesh interprets that the texture will follow the positions of the vertices of the UV map.4. The last step is to associate the texture you've just created to a texture image. Right now you can associate any texture to it, it doesn't have to be the right one as this will be done later in NifSkope. To associate the texture image press the Texture buttons (F6) as shown in the Associating an image to the texture picture, and in the Texture type drop down list select Image.
A window will pop up where you can select the texture dds image and, as I've explained before at this moment you can associate any dds file you have as we will associate the right one in NifSkope later.Add a UV map. UV/Image EditorOnce your armour has the shape yo want and at least you've added one material, you have to colour it or it will be seen as transparent in game.To do this the first step is to create the UV maps.
The UV maps are projections in 2 dimensions of the mesh that is a 3 dimensional object. With the UV maps you are telling the mesh what part of the texture (that is a 2 dimensional image) has to be painted on each of the faces of the mesh.To create the UV map:. Subdivide Blender screen in two screens: right double click on the top of the screen and select Split area from the pop up menu.
Then move the line until it is more or less in the middle of the screen, separating it in two sections of the same size. Select UV/Image Editor on the right screen as shown in the picture. On the left screen, where your armour is, do the following:For objects or parts of the armour with simple shapes. in Edit Mode select the faces of the armour that you want to paint togheter. select the menu option Mesh - UVUnwrap and you'll see a pop up window like the one shown in the UVUnwrap window picture. Select the option to generate the UV maps that works better for you. I usually select Unwrap or Project from View but you can try the different options and see which one fits your needs.
If you use Project from View first move the armour until you see all the faces you've selected as you want them to be projected in the UV map because this option will paint them as they are shown on the screen.For objects or parts of the armour with complex shapes. UV map generated using seamsIn armours or clothes shapes are usually complex and to paint them it is better to create UV maps of parts of each piece of cloth. Imagine this process as the cuts you'll make to a real shirt to extend the cloth completely on a table to paint it.To subdivide the object into parts, you have to create a series of cuts or seams in the object (like the seams in real clothes). To mark these seams:. In Edit mode select the edges that define a line. Take into account that this line wil be where two parts of the texture will join, so there will be little discontinuities in the painting along it. For this reason it is convenient that you mark the seams in places where in real life clothes already have seams or in places that will be hidden most of the time in game like the lower part of the arms.
Select the menu option Mesh - Edges - Mark Seam (see picture Mark a seam. You'll see that the line of vertices you selected turns into a dark orange colour. Keep on creating seams in your armour until all pieces of it are completely delimited by seams. Open the menu option Mesh - UVUnwrap and select the Unwrap option.
Blender will generate automatically a UV map similar to the one shown in picture UV map generated using seams.Once you have generated all the UV maps for your armour save a file with the UV map image. You will use this file you are saving as a pattern to paint the armour textures later. To save this UV map image on the right screen select the menu option UVs - Scripts - Save UV Face Layout and press OK. Select the folder and enter the name of the file where you want to save your UV map on the pop up window.Create the textures and the normal maps in GIMPThis step is exactly the same than the one explained in the tutorial because it doesn't matter the mesh you are working with: you will create the textures and normal maps following the same steps. Normal map windowNext step is to paint the textures: to do this you can use a program like.
You can immport the UV map image file you saved earlier into GIMP and use it as a pattern to paint the textures: this way you will know at any time what part of the sword you are painting.Once you've painted the armour textures save them as dds as this is the image format that the game requires. If the images don't have transparent parts you can save them with DTX1 compression. If they have transparency, saved them as DTX3 or DTX5. Make sure that the Generate mipmaps flag is marked when you save the textures.Once you've painted the textures you'll have to create the normal maps that are the image files that will give your sword a sense of volume. You can create the normal map from the texture you've just painted, to do it this way just follow these steps:.
Select Colors - Color to alpha and then select black or 000000 as the source colour. Select Filter - Map - Normalmap. A window will pop up like the one shown in the Normal map window picture. pressing 3d preview you will be able to see in another screen how the changes in the parameters give more or less deep to the normal map.
select the Wrap flag and change the value of Height source to Alpha. select a filter (I usually select 3x3 but you can try different filters and see which one works better for you). modify the scale value to add more or less deep to the normal map (I usually set this to 3 or 4).
Press the OK button and the image will show now a blueish look: this is the normal map. Save it with the same name than your texture file + the msn.dds extension and choose the DTX5 compression. Reducing the polygon countIf you are like me it is likely that the armour you've build until now has a big amount of polygins, what translates into a big nif file and worse performance in game.You can reduce the number of polygons using the Decimate modifier but that will destroy any UV map you've generated, so the best thing is to use the Poly Reducer script:. In Edit mode select all the vertices of your mesh. Select the menu option Mesh - Scripts - Poly Reducer.
A window will pop up with the default values Blender has for reducing the polygons. Bone Weight Copy script parametersThis is the easiest way of adding weights to an armour and luckily, in most cases, it works well and there is no need to use any other method. The steps to follow are:. In Object mode select the object you are going to add the weights to (your armour) and on the Vertex Groups tab press the Delete button as many times as needed until there is no weight assigned to the object (see picture Deleting existing weights). In Edit mode select all the vertices of your object. To do this press the A key (if you had any vertex selected, when pressing A for the first time it will be deselected, then press A again and all vertices will be selected). Go back to Object mode and select your object first, and then select the object you are going to use as the source of the weights (to select two objects at the same time press the Shift key).
You can use as a source the body you are creating the armour for, or another armour that is made for the same body you are using. Take into account that each body has slightly different weights. Select the menu option Object - Scripts - Bone Weight Copy (see picture Bone Weight Copy script).
A window will pop up showing the default parameters for the script (see picture Bone Weight Copy script parameters). Put quality to 3 as a maximum: you don't need more quality and for Fallout meshes a higher quality value often makes the script to end in error. Press the OK button and wait a long time until the script has finished copying the weights, and then save the changes. If your armour has a lot of polygons, it will take longer for the script to copy all the weights, so if you are planning to reduce the polygon count, do that before copying the weights.
If your armour is made of more than one object, repeat the process for each part of the armour, one by one.Copy partially the weights from another meshSometimes you will need to copy the weights from a source only to part of your armour. If, for example, you try your armour in game and see that part of it moves odd you can try fixing it by modifying the weights of that part of the armour unsing this method. To use it follow these steps:. Don't delete any of the existing weights of your armour. In Edit mode select only the vertices of the area of your armour whose weights you want to modify.
Go back to Object mode and select your object first, and then select the object you are going to use as the source of the weights (to select two objects at the same time press the Shift key). You can use as a source the body you are creating the armour for, or another armour that is made for the same body you are using. Take into account that each body has slightly different weights. Select the menu option Object - Scripts - Bone Weight Copy (see picture Bone Weight Copy script). A window will pop up showing the default parameters for the script (see picture Bone Weight Copy script parameters).
Sahih Al Bukhari all ten volumes download. Sahih Bukhari Volume 1. Sahih Bukhari Volume 2. Sahih Bukhari Volume 3. Sahih Bukhari Volume 4. Sahih Bukhari Volume 5. Sahih Bukhari Volume 6. Sahih Bukhari Volume 7. Sahih Bukhari Volume 8. Sahih Bukhari Volume 9. Sahih Bukhari Volume 10. Do you like this post? Here is full Sahih Bukhari Shareef By Imam Bukhari Rahmatullahi Alaihi all Languages Translation PDF with Interactive Link (Smart PDF) free Download Sahih Al-Bukhari in Bangla, English, Arabic, Urdu, Hindi, Tamil, Chinese, French, Japanese, Korean, Russian, Kannada Version PDF Collection. Sahih al bukhari in arabic and english.
Put quality to 3 and press the button Update Selected. Press the OK button and wait until the script has finished copying the weights, and then save the changes.
The script will finish sooner than with the previous method because it only has to modify the weights of part of your armour.Paint the weights by handThis is the most difficult and arduous method for assigning weights to an object and usually it is only required to give the finishing touches to the armour, and only when none of the two previous methods have worked completely. Painting weights by handTo paint weights by hand (see picture Painting weights by hand):.
In Object mode select the object whose weights you want to modify. Go to Weight Paint mode:. You'll see that your object shows now several colours, as shown in picture Painting weights by hand.
These colours are the weights that each area has with respect to the bone you have selected in the Vertex Groups tab. The weights go from red that represents a weight of 100% to dark blue that represents a weight of 0% (see picture Weight Paint: Colour codes for weights). For example, in the picture the weights shown on the shirt are its weights with respect to the Bip01 Spine2. On the lower part, on the Paint tab, there are the brush controls. The most important are:. Weight: modifying this value you will be painting higher or lower weights (1.00 means 100%, 0.90 means 90%, and so on). Opacity: indicates if the brush is completely opaque which means that with one stroke you will change completely the weight of the area you are painting, or translucent which means that with each stroke you only modify the existing weights a little.
Buy Fur Armor
Size: if the brush is very big you'll be modifying the weights of a big area of the mesh with one stroke. You'll see that the cursor on the screen has the shape of a brush. To modify the weights of your armour simply select the bone whose weights you want to modify on the Vertex Groups area and paint with the brush on your armour. If you want to modify the weights of more than one bone you will have to repeat the process for each bone, selecting it in the Vertex Groups area.Note: Growlf has released this utility: that contains some of the vanilla animations and a full skeleton. This utility makes it faster to paint the weights by hand, to refine them, as you can see the results of changing the weights immediately in Blender without having to export the mesh and test it in game.
I absolutely recommend it. Fix the dismemberment weights.
Skyrim Female Fur Armor Model
IntroductionWildling Fur Armor was created for the project, and adds a brand-new set of light armor to the game based on the bandits and wild men found in Cyrodiil. This armor set comes in two variants, 'Wildling' and 'Wildling Bone', both featuring unique gloves, boots, helmet, and cuirass. Every piece in both sets will work for both males and female of every race, and is completely weight-slider compatible.Both 'Wildling' and 'Wildling Bone' variants can be crafted at the forge, or found randomly in the world and worn by NPCs.FEATURES.
Custom models and texture s. Two unique variants. Male and female versions.
Weight-slider support. Works with beast races. Custom ground/inventory modelsArmor StatsArmor rating and price for both sets is comparable to Leather armor, with the 'Wildling' cuirass offering slightly less protection due to the lack of chest armor. 'Wildling Bone' pieces are slightly heavier.Where is the armor?Both armor sets can be crafted at the forge, found as random loot, or purchased from blacksmiths.Additionally, both armor sets have been added to Light Armor leveled lists, so they will sometimes appear on respawning NPCs.Note: 'Bone' gloves and boots require a new item, Imp Skull, to craft.
Imp skulls can be purchased from any merchants selling pelts or animal parts.If you have other mods that edit leveled lists, you will need to use Wrye Bash to merge your leveled lists!.Credits and PermissionsThe concept for this outfit was created by Suran, a member of the Beyond Skyrim team.All assets in this mod were created specifically for, and may NOT be used for any other project, modding or not, commercial or not. Don't PM me to ask, because it won't happen. The ONLY exception to this is mods which will rely on Beyond Skyrim: Cyrodiil as a master.